DIY Walkthrough: Install a Mule application as a Maven dependency
In this walkthrough, you reuse the flows of one Mule application in another Mule application. First, you install a (reusable) Mule application into your local Maven repository folder, then you refer to the installed reusable Mule application's flows from another (main) Mule application. You will:
· Install a reusable Mule application's jar file into a local Maven repository m2 folder.
· Add the reusable Mule application dependency to the main Mule application's pom.xml file.
· Verify the installation of the reusable Mule application into the main Mule application.
· Call a flow of the installed reusable Mule application from the main Mule application.
Install a Mule application into the local Maven repository
1. In Anypoint Studio, create a new Mule project named main.
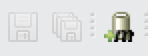
2. Click the Maven icon in the upper-left corner of Anypoint Studio.
3. In the Install file into local repository dialog box, click Browse for the POM file.
4. In the file dialog box, browse to the pom.xml file located in the /files/module06/templates_app/ folder located in the MUFundamentals4.x DIY Files zip that you can download from the Course Resources.
5. Click Open.
6. In the Install file into local repository dialog box, click Browse for the file.
7. In the file dialog box, select the module06-templates.jar file in the /files/module06/templates_app/ folder.
8. Click Open.
9. In the Install file into local repository dialog box, verify that the group ID, artifact ID, and version values are set, but the classifier is empty.
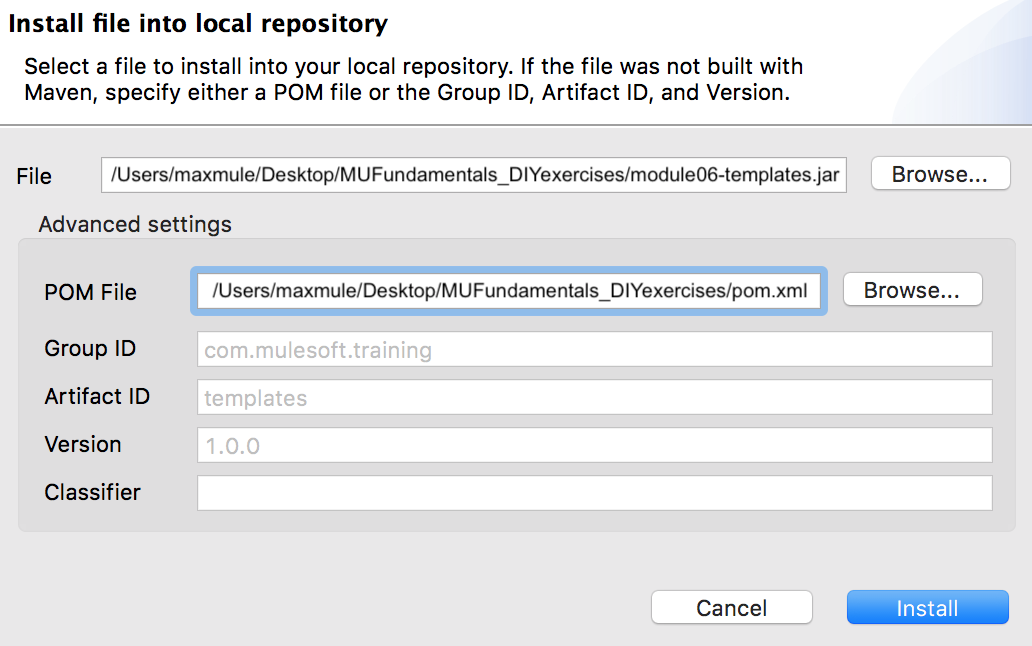
10. Click Install.
11. In the Install file into local repository dialog box, click OK.
Verify the Mule application is installed in your local Maven repository m2 folder
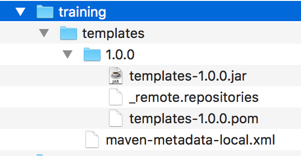
12. In the computer's file explorer, navigate to your user directory, which is often located at /Users/{your_user_name}.
13. In your user home directory, navigate to:
.m2/repository/com/mulesoft/training/templates
14. Verify that the following files are present in the templates folder with the exact names listed below.
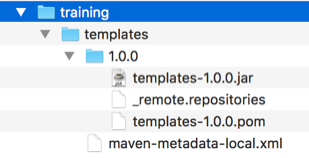
Note: The reusable Mule application is called templates and its flows are stored in the templates-1.0.0.jar file.
Add a Mule application dependency to another Mule application's pom.xml file
15. Return to Anypoint Studio.
16. From the Package Explorer, open the main Mule application's pom.xml.
17. Select the Source tab at the bottom of pom.xml.
18. In the dependencies section of pom.xml, add a new dependency to refer to the templates artifact defined in the templates Mule application's pom.xml file.
…
<dependency>
<groupId>com.mulesoft.training</groupId>
<artifactId>templates</artifactId>
<version>1.0.0</version>
</dependency>
</dependencies>
19. Save pom.xml.
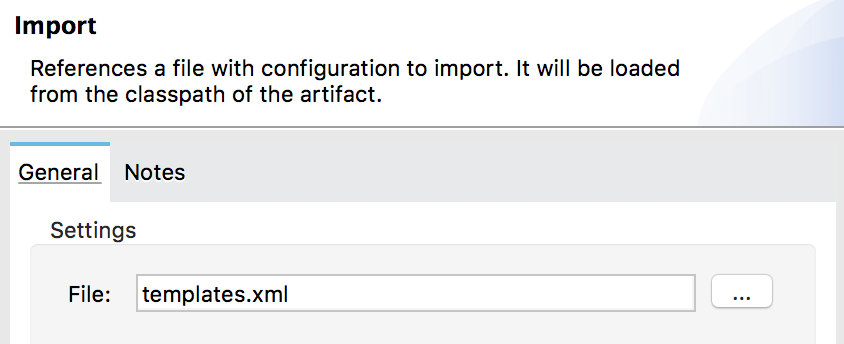
Import the templates.xml file contained in the templates Mule application
20. Return to main.xml.
21. Select the Global Elements tab at the bottom of the canvas.
22. Click Create.
23. In the Choose Global Type dialog box, select Global Configurations > Import.
24. Click OK.
25. In the Import dialog box, set the file to templates.xml.
26. Click OK.
Note: The templates.xml file is the Mule configuration file for the templates Mule application that contains flows that can be referenced from the main Mule application.
Create an HTTP Listener to receive requests
27. Return to the Message Flow view in main.xml.
28. Drag an HTTP Listener from the Mule Palette to the canvas.
29. In the Listener properties view, click the Add button next to Connector configuration.
30. In the Global Element Properties dialog box, set the host to 0.0.0.0 and the port to 8081.
31. Click OK.
32. In the Listener properties view, set the path to /test.
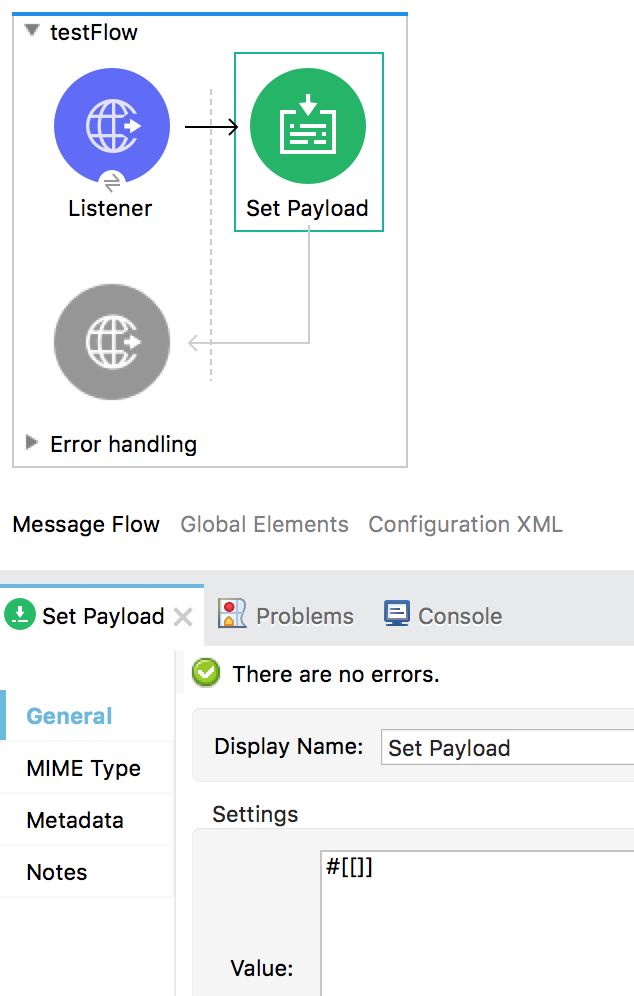
Set the payload to an empty array
33. Drag a Set Payload transformer from the Mule Palette into the process section of the flow.
34. In the Set Payload properties view, set the value to an empty array.
#[[]]
Call a flow in the templates Mule application from the main Mule application
35. Drag a Flow Reference component from the Mule Palette and drop it at the end of the flow.
36. In the Flow Reference properties view, set the flow name to validateArray.
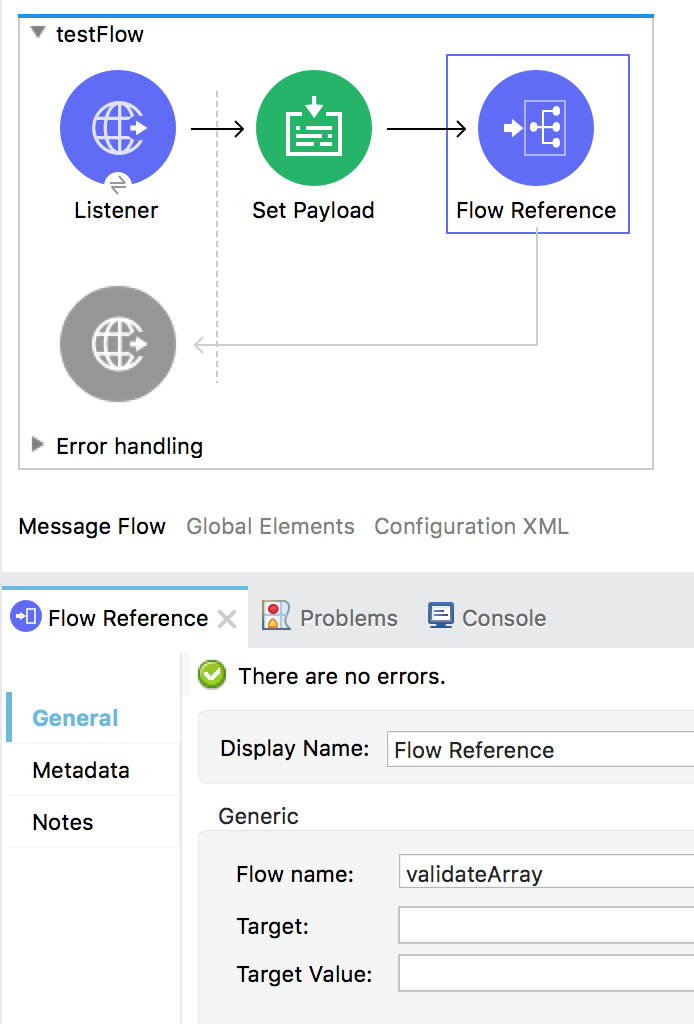
Note: The validateArray flow is defined in templates.xml in the templates Mule application. The flow will print out an error message in the console if the payload is an empty array.
Test the application
37. Save the file and run the project.
38. In a web browser, navigate to http://localhost:8081/test.
39. Return to Anypoint Studio.
40. Verify a Payload is empty error message appears in the Console view.

41. Stop the project.